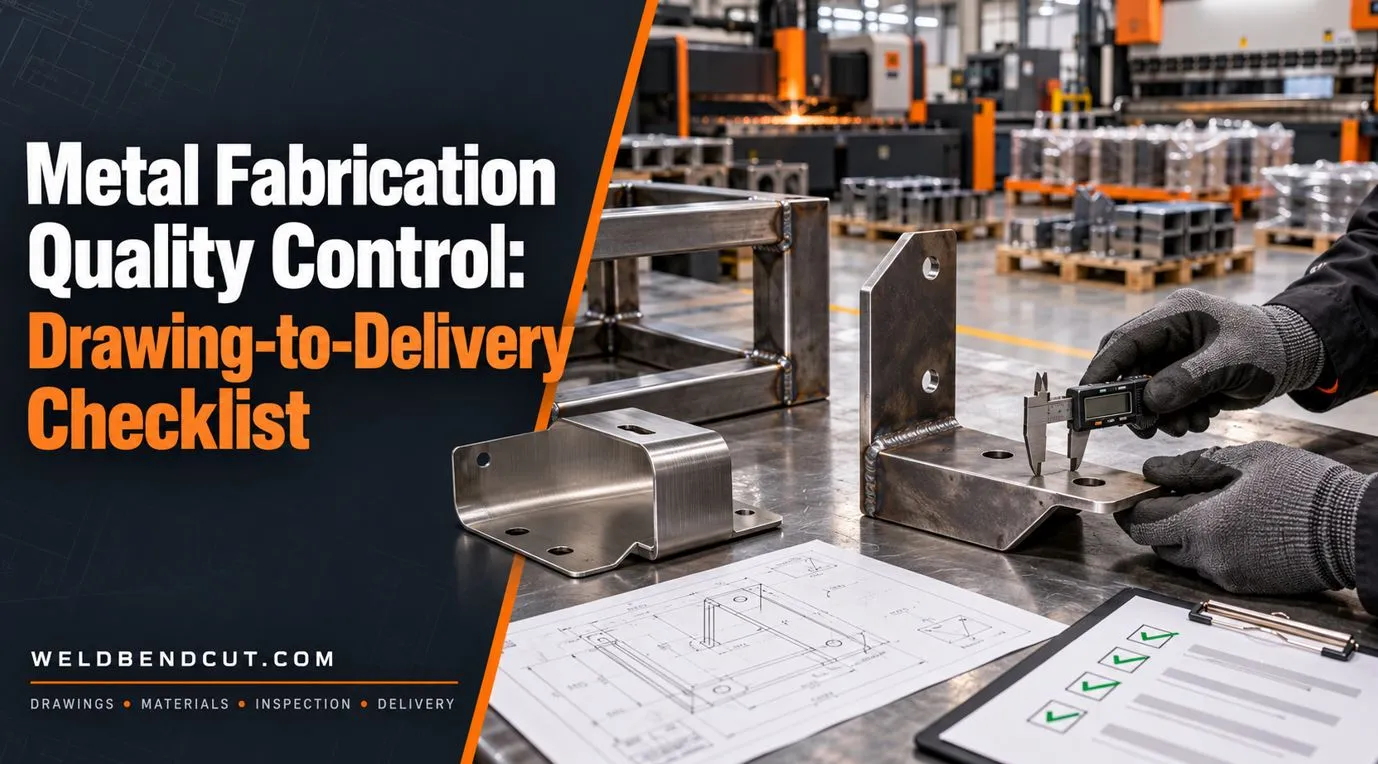
Quality control in metal fabrication is not a final inspection performed after the product is complete. By that stage, a wrong material grade may be welded into the assembly, a hole pattern may be hidden and a finish defect may require complete rework.
Effective quality control places simple checks at the points where errors can still be corrected economically. It begins with the customer requirements and continues through document review, material receipt, cutting, forming, welding, finishing and delivery.
Define Acceptance Before Production
A product cannot be inspected fairly when requirements are vague. Confirm:
- drawing and model revision;
- material grade and thickness;
- dimensions and tolerances;
- weld symbols and quality level;
- applicable codes or standards;
- surface finish;
- coating specification;
- inspection or testing;
- documentation; and
- delivery condition.
Resolve conflicts before work begins. If the 3D model shows one hole position and the drawing another, production must not choose whichever looks convenient.
Record approved clarifications and design changes. Verbal decisions should be incorporated into controlled documentation.
Review the Drawing for Manufacturability
Conduct a pre-production review involving design, production and quality where appropriate.
Check:
- all required views and dimensions;
- consistent datums;
- realistic tolerances;
- weld access;
- bend feasibility;
- cutting capability;
- fixture requirements;
- coating allowances;
- inspection access; and
- assembly sequence.
Flag critical-to-quality characteristics such as mounting interfaces, sealing faces, safety-related welds and customer-visible surfaces. These features deserve specific inspection points.
Control Files and Revisions
Only released documents should reach production. A controlled job pack may include:
- assembly drawings;
- part drawings;
- DXF cutting files;
- bend drawings;
- CNC programs;
- BOM and cut list;
- welding procedures;
- inspection plan; and
- finish requirements.
Use part numbers and revision identifiers consistently. Remove obsolete files from shared production folders or mark them clearly so they cannot be used accidentally.
When a change occurs, assess work already in progress and raw material already cut. Revision control includes physical parts, not only digital files.
Inspect Incoming Material
Before cutting, verify:
- material grade;
- specification or certificate;
- thickness and profile size;
- heat or batch identification where required;
- quantity;
- surface condition;
- straightness or flatness; and
- damage or corrosion.
Maintain traceability for projects that require it. Marking methods must remain legible through production without damaging the finished product.
Quarantine material whose identity is uncertain. Similar-looking stainless, aluminium and steel grades should never be accepted based only on appearance.
Verify Measuring Equipment
Inspection is only as reliable as the measuring system. Select suitable equipment for the tolerance and feature:
- tape measure;
- steel rule;
- square;
- calliper;
- micrometer;
- height gauge;
- angle gauge;
- surface plate;
- weld gauge; or
- coordinate measuring equipment.
Keep devices calibrated or verified according to the quality system. Check for damage, clean contact surfaces and use correct technique.
A tape measure may be adequate for the overall length of a welded frame, but it is not suitable for a precision shaft diameter.
Perform First-Article Inspection
Inspect the first component from a new setup before completing the batch. This confirms the program, tooling, orientation and interpretation.
For CNC-cut parts, verify:
- outer dimensions;
- hole size and position;
- edge quality;
- kerf or taper effects;
- part identification;
- scale and units; and
- material and thickness.
For bent parts, verify flange lengths, bend angles, overall size and feature location after forming. If corrections are needed, update the controlled setup rather than making undocumented adjustments.
First-article approval does not eliminate in-process inspection; it prevents one setup error from producing an entire batch of scrap.
Check Cutting Operations
During sawing, plasma, laser or waterjet cutting, monitor:
- correct stock;
- program and revision;
- part quantity;
- orientation and grain direction;
- edge quality;
- dross or burr;
- thermal distortion;
- consumable condition; and
- part marking.
Separate conforming parts from scrap and remnants. Label components immediately, especially when left- and right-hand versions look similar.
Do not allow heavy dross or burr to pass downstream as “the welder’s problem.” Each process should deliver parts ready for the next defined operation.
Inspect Forming and Bending
Bend errors compound quickly in multi-bend parts. Check the first bend and intermediate dimensions where later bends will block access.
Confirm:
- material orientation;
- correct punch and die;
- bend direction;
- angle;
- inside radius where specified;
- flange dimension;
- hole distortion;
- surface marking; and
- final overall dimensions.
Springback and material variation can require controlled adjustment. Record proven machine settings or bend-table corrections for repeat jobs.
Control Fit-Up Before Welding
Welding makes correction more difficult. Inspect the dry assembly or tacked structure before final welding.
Check:
- part identity and orientation;
- joint preparation;
- root opening;
- alignment and mismatch;
- diagonal dimensions;
- fixture seating;
- tack quality;
- cleanliness; and
- access for the specified weld.
Confirm that temporary attachments, backing and purge arrangements follow the approved procedure. Do not use welding to fill avoidable gaps created by inaccurate cutting.
Monitor Welding Variables
For controlled work, verify that the welder, process, consumable and procedure match the requirement. Depending on the project, records may include:
- welder qualification;
- welding procedure specification;
- filler classification and batch;
- shielding gas;
- preheat;
- interpass temperature;
- current, voltage or wire feed;
- travel sequence; and
- environmental conditions.
The required level of documentation depends on the code and customer specification. Safety-critical work must be managed by suitably qualified personnel.
Good production discipline also checks ground connections, consumable storage, gas leaks and equipment condition before defects occur.
Inspect Welds at the Right Time
Visual inspection should occur during and after welding, not only after grinding or paint.
Look for:
- correct weld location, size and length;
- acceptable profile;
- undercut;
- overlap;
- cracks;
- porosity;
- incomplete fusion indicators;
- crater defects;
- arc strikes;
- spatter; and
- distortion.
Additional non-destructive examination—such as penetrant, magnetic-particle, ultrasonic or radiographic testing—must be selected and performed according to the applicable specification.
Do not grind away evidence before required inspection is complete. Miller’s overview of common welding-operation mistakes reinforces the value of procedure control, maintenance and operator training.
Verify Dimensions After Welding
Heat and shrinkage can change dimensions that were correct during fit-up. Inspect:
- overall length, width and height;
- diagonals;
- flatness and straightness;
- mounting-hole patterns;
- door or drawer openings;
- mating interfaces; and
- installation points.
Use the drawing datums. If an assembly is measured from a different reference each time, results will be inconsistent.
Document approved repair or straightening methods. Uncontrolled heating can affect material properties and residual stress.
Inspect Surface Preparation and Finish
Before coating, confirm that fabrication is complete and surfaces are ready. Check:
- oil and contamination removal;
- weld spatter;
- sharp edges;
- grinding marks;
- blasting cleanliness and profile;
- drainage and vent holes;
- masked features; and
- surface defects that coating will not hide.
After finishing, inspect colour, coverage, thickness, adhesion or other specified properties. Confirm that threaded holes, electrical contacts and precision fits remain functional.
For stainless, verify finish direction, cleaning and treatment of heat tint as specified.
Conduct Final Assembly and Functional Checks
A dimensionally correct product can still fail operationally. Test relevant functions:
- doors open and latch;
- drawers slide;
- wheels rotate and lock;
- removable bars fit;
- shelves locate correctly;
- fasteners reach torque;
- products stand level;
- mating parts assemble; and
- labels and accessories are present.
Check appearance under consistent lighting. Remove temporary markings, abrasive residue and cutting film unless the delivery specification says otherwise.
Record Nonconformities
When a part does not meet requirements, identify and segregate it. Record:
- part and revision;
- requirement;
- actual condition;
- quantity affected;
- probable cause;
- disposition; and
- corrective action.
Possible dispositions include rework, repair under approval, use-as-is concession or scrap. The person performing the work should not silently decide that a deviation is acceptable.
Look for systemic causes. Repeated hole-position errors may come from an outdated DXF, unclear datum or worn locator—not carelessness by individual operators.
Protect Quality During Packing and Delivery
Quality can be lost after final inspection. Protect finished products from:
- impact;
- moisture;
- metal-on-metal rubbing;
- unsuitable adhesive tape;
- forklift damage;
- contamination; and
- movement in transport.
Use lifting points and packaging appropriate to the weight and finish. Include drawings, certificates, spare parts and installation instructions required by the order.
Record final photographs where useful and confirm the delivery count.
Drawing-to-Delivery Checklist
Before closing the job, confirm that:
- scope and revision are approved;
- materials are verified and traceable where required;
- measuring tools are suitable;
- first articles passed inspection;
- cutting and bending checks are recorded;
- fit-up was accepted before final welding;
- welding followed the required procedure;
- welds received specified inspection;
- post-weld dimensions conform;
- surface preparation and finish are accepted;
- functional checks pass;
- nonconformities are closed;
- documentation is complete; and
- packaging protects the finished product.
Final Thoughts
Fabrication quality improves when checks are placed before irreversible operations. Verify material before cutting, geometry before welding and surface condition before coating. Each early check is faster and cheaper than correcting a completed assembly.
Build the inspection plan around the drawing’s functional requirements, record evidence at critical stages and use nonconformities to improve the process. Quality control then becomes a production tool—not a final barrier between the workshop and delivery.
 No products in the cart.