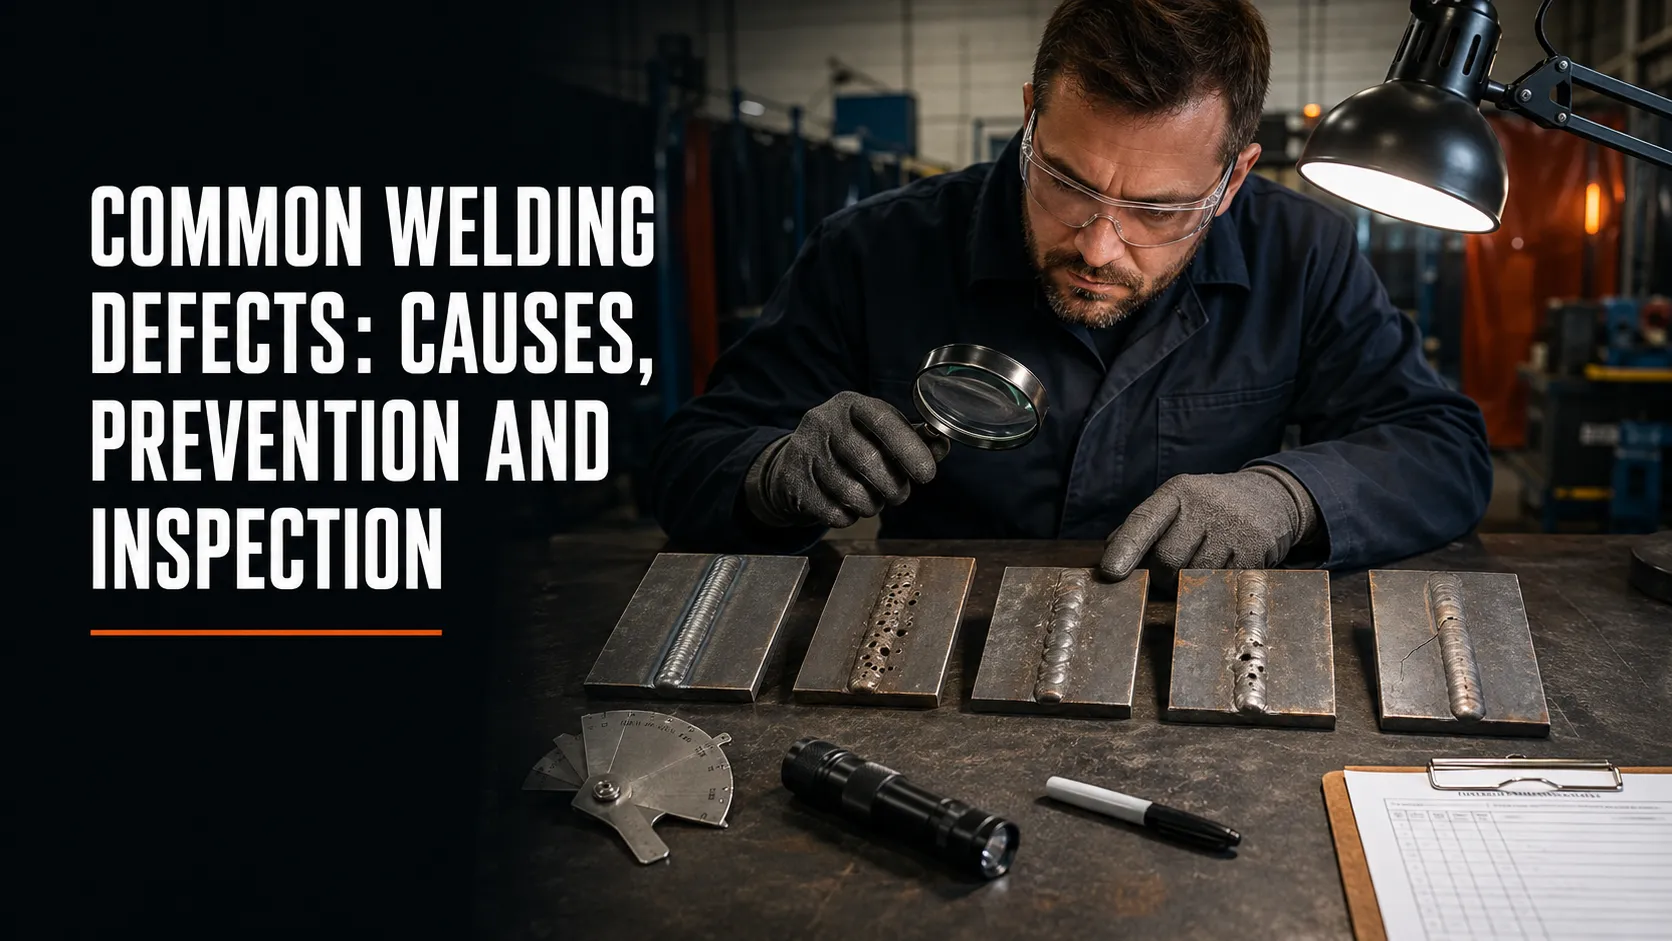
A weld can look acceptable from a distance and still contain flaws that reduce strength, fatigue life, leak resistance or corrosion performance. Repairing defects after final assembly is expensive, so the best strategy is to understand how they form and prevent them at the source.
This guide covers common welding defects and practical prevention measures. Acceptance limits depend on the drawing, welding code, service and inspection plan. A visible indication is not automatically acceptable or rejectable without the correct criteria.
Begin With a Controlled Process
Most defects trace back to one or more of five areas:
- incorrect joint design or fit-up;
- contaminated material or consumables;
- unsuitable welding parameters;
- poor shielding or equipment condition; and
- inconsistent technique.
Before welding, verify the material, WPS, filler classification, gas, polarity, joint preparation and preheat requirements. For safety-critical work, qualified welders and approved inspection are essential.
Porosity
Porosity consists of gas pockets trapped as the weld solidifies. It may appear as scattered surface pinholes, clustered pores or internal cavities detected by testing.
Common causes
- oil, grease, paint, rust or moisture;
- inadequate or disturbed shielding gas;
- excessive gas flow causing turbulence;
- blocked nozzle or gas leak;
- damp electrodes or flux;
- long arc length; and
- contaminated aluminium oxide or filler wire.
Prevention
Clean both sides of the joint. Allow approved solvents to evaporate completely. Protect gas-shielded processes from drafts, verify flow at the torch and inspect hoses, diffusers and O-rings. Store consumables correctly.
For aluminium, degrease first and then remove oxide with a clean stainless brush reserved for aluminium. Miller emphasizes removing oil, grease, dirt and moisture in its industrial aluminium welding guide.
Lack of Fusion
Lack of fusion occurs when weld metal does not fuse properly with the base metal or a previous weld run. It can create a serious planar flaw even when the bead surface appears smooth.
Common causes
- insufficient heat input;
- travel speed too fast;
- arc not directed at the joint faces;
- restricted joint access;
- scale, oxide or slag on the surface;
- incorrect torch or electrode angle; and
- weld pool running ahead of the arc.
TWI identifies narrow joint preparation, incorrect parameters, poor technique and insufficient cleaning among the causes of lack of sidewall and inter-run fusion.
Prevention
Prepare the correct groove angle and root opening. Remove scale and slag. Use approved settings and maintain a travel speed that allows the arc to work on both joint faces. Clean between passes and keep the weld pool behind the leading edge of the arc.
Incomplete Penetration
Incomplete penetration occurs when the weld does not extend through the required root of the joint.
Common causes
- root gap too small;
- root face too large;
- groove angle too narrow;
- electrode too large for the joint;
- current too low;
- travel speed or technique unsuitable; and
- misalignment blocking root access.
Prevention
Check bevel, root face and gap before tacking. Maintain the gap during welding and use backing or back-gouging where specified. Do not try to solve a poor joint preparation only by increasing current; that can create undercut or burn-through elsewhere.
Undercut
Undercut is a groove melted into the base metal beside the weld toe or root that is not filled with weld metal. It reduces local thickness and creates a stress concentration.
Common causes
- current or voltage too high;
- travel speed too fast;
- excessive arc length;
- incorrect work angle;
- wide weaving without controlled pauses; and
- poor bead placement.
Prevention
Use settings within the approved range, shorten the arc and direct filler into the toes. Reduce weave width or use stringer beads where appropriate. Avoid racing along the joint faster than the edges can fill.
Overlap and Excessive Convexity
Overlap occurs when weld metal rolls onto the base surface without fusing. Excessive convexity creates a steep weld profile and poor toe transition.
Typical causes include travel speed that is too slow, incorrect angle, insufficient heat, depositing too much filler and using an electrode or wire that is too large for the joint.
Use the specified weld size. Maintain heat and travel that allow the bead to wet smoothly into the base metal. Do not build a large cap to hide an irregular underlying pass.
Slag Inclusions
Slag inclusions are non-metallic material trapped in the weld, commonly associated with stick and flux-core processes.
Common causes
- failing to clean between passes;
- narrow groove or poor access;
- incorrect angle or bead placement;
- low heat input;
- undercut in a previous pass trapping slag; and
- placing the next bead over an irregular surface.
Prevention
Remove slag completely after every pass using appropriate tools. Grind stubborn islands where allowed. Provide sufficient groove access and place beads so the next pass can fuse the previous toes.
Cracks
Cracks are among the most serious welding flaws. They may form during solidification, after cooling or later in service.
Possible causes
- unsuitable filler or base-metal chemistry;
- high restraint and residual stress;
- rapid cooling;
- hydrogen from moisture or contamination;
- incorrect preheat or interpass control;
- poor crater filling;
- excessive joint stress; and
- welding a crack-sensitive alloy without the correct procedure.
Prevention
Identify the material, use the specified low-hydrogen practice, control consumable storage, apply required preheat and follow the sequence. Reduce unnecessary restraint and finish craters correctly. Never weld over a visible crack. Remove it fully and repair under an approved method.
Cracks must be evaluated using the governing acceptance criteria. In many applications they are unacceptable regardless of size.
Burn-Through
Burn-through is an opening created when the weld pool collapses through thin material or an excessive root gap.
Causes include excessive current, slow travel, large root opening, poor edge alignment and concentrated heating in one area.
Use tight, consistent fit-up; appropriate wire or electrode size; controlled travel; backing where approved; and a sequence that lets thin sheet cool. Do not fill a large gap with repeated hot passes if the part should be refitted or repaired first.
Excessive Spatter
Spatter consists of droplets that attach around the weld. Some processes produce more spatter than others, but excessive levels may indicate poor setup.
Check voltage, wire-feed speed, polarity, contact-tip condition, work-clamp connection, stickout, gas and surface cleanliness. Excessive anti-spatter compound can contaminate the joint, so apply only as directed and keep it away from critical weld faces.
Arc Strikes
An arc strike outside the intended weld can locally harden or crack the base metal and damage a finished surface. Connect the work clamp securely and control the electrode or gun when starting.
Do not casually grind an arc strike away on a coded component. Follow the specified inspection and repair procedure.
Distortion and Misalignment
Distortion is a dimensional defect even if the weld itself is sound. Excessive gaps, unbalanced welding, large beads and accumulated heat can warp the assembly. Misalignment can increase stress and reduce fatigue performance.
Use accurate parts, fixtures, balanced tacks and a planned sequence. Measure during welding rather than after every joint is complete.
Stainless Steel–Specific Problems
Stainless steel can suffer heat tint, sugaring and loss of corrosion performance if oxygen exposure and heat input are poorly controlled. Full-penetration pipe and sanitary joints may require root purging. Use dedicated stainless tools to avoid iron contamination.
Miller explains that heat tint, porosity and distortion in stainless applications are strongly connected to excessive heat and oxygen exposure in its guide to stainless welding defects.
Inspect at the Right Stages
Visual inspection begins before welding. Inspect material condition, groove preparation, root gap, alignment, consumables and tacks. During welding, check interpass cleaning, bead placement and temperature. After welding, examine profile, size, toes, craters, surface pores, cracks, spatter and dimensions.
Additional methods may include penetrant, magnetic-particle, ultrasonic or radiographic testing. The method must suit the material, joint and flaw type. Inspection should follow the specified code and qualified procedure.
Use Root-Cause Correction
When a defect appears, do not only repair the visible area. Determine why it occurred.
For example, repeatedly grinding and rewelding porosity will not help if the gas hose is leaking. Adding more weld over lack of fusion may hide the indication while making repair harder. Record the defect, cause, corrective action and verification.
Defect-Prevention Checklist
- Confirm material and approved procedure.
- Clean and dry the joint.
- Verify fit-up, gap and alignment.
- Select correct filler, gas and polarity.
- Inspect equipment and work-clamp connection.
- Protect shielding from drafts.
- Maintain settings and technique within the procedure.
- Clean between passes.
- Control heat and welding sequence.
- Inspect before, during and after welding.
Conclusion
Welding defects are easier to prevent than repair. Clean material, correct joint geometry, reliable shielding, suitable parameters, controlled technique and staged inspection remove many common causes.
When a flaw is found, treat it as process information. Correct the root cause, apply the approved repair and verify the result. That approach produces more consistent welds and reduces costly rework across the workshop.

 No products in the cart.